Are you dealing with frustrating startup issues? Dell laptops sometimes fail to boot properly, leaving you searching for reliable answers.
Whether it’s freezing at the Dell logo, stuck in an endless restart loop, or not powering on, these boot problems can severely disrupt your workflow and cause undue stress.
This comprehensive Dell laptop boot troubleshooting guide is designed to help you identify the root cause and resolve common boot problems efficiently. Follow our step-by-step solutions to get your Dell laptop up and running quickly!
What is the Boot Process?
The boot process begins after your laptop successfully passes the POST stage (Power-On Self-Test). POST ensures that hardware like RAM, CPU, and graphics components function. Once POST is complete, the boot process loads your operating system from the SSD or HDD into your laptop’s memory. If there’s an issue at this stage, you might see:
- A blank or black screen
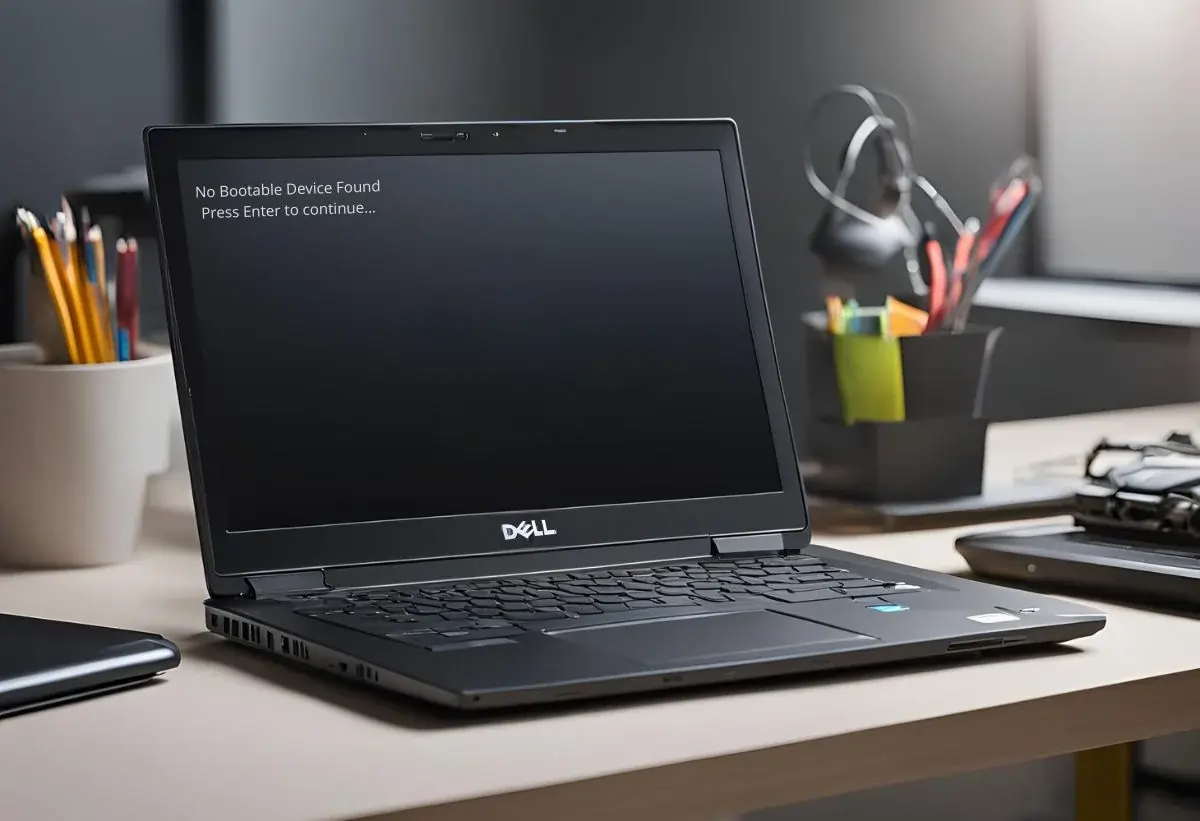
- Error messages like “No Boot Device Found.”
- A stuck loading screen
Common causes include corrupted operating system files, hardware failure, or incorrect boot configurations. Let’s explore how to troubleshoot these problems.
Dell Laptop Boot Troubleshooting: Step 1 Perform Basic Checks
Check for External Peripherals
Disconnect all external devices (USB drives, external hard drives, etc.) and restart your laptop. Sometimes, the system attempts to boot from a connected device, causing errors.
Inspect Your BIOS Settings
Ensure the correct boot device is prioritized in the BIOS. To access the BIOS:
- Restart your laptop and press F2 when the Dell logo appears.
- Navigate to the “Boot” tab and confirm that your internal drive is set as the primary boot device.
Power Cycle Your Laptop
Perform a power reset to clear temporary glitches:
- Shut down your laptop completely.
- Remove the battery and unplug the charger.
- Hold the power button for 15-20 seconds.
- Reconnect the power source and turn on the Laptop.
For more details, check out this guide on troubleshooting power issues.
If the operating system troubleshooting doesn’t resolve the issue, your drive may be at fault. Here’s how to check:
Dell Laptop Boot Troubleshooting: Step 2: Test Your SSD or HDD
Run Dell ePSA Diagnostics
Dell laptops include a built-in diagnostic tool:
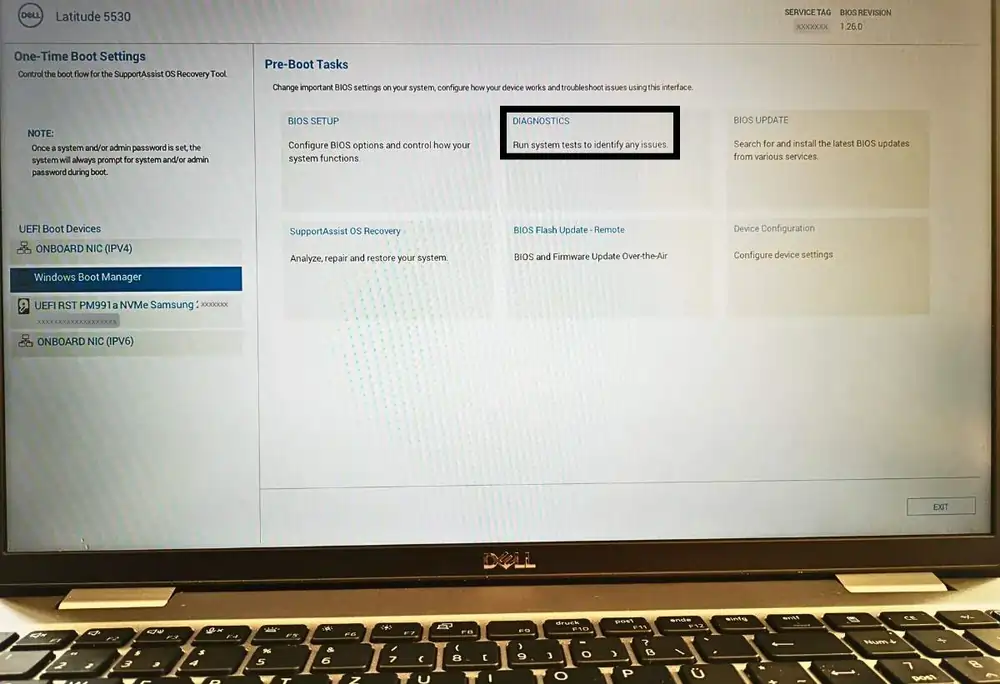
- Restart the Laptop and press F12 when the Dell logo appears.
- Select “Diagnostics” from the menu to run the Dell ePSA Diagnostics.
- Let the tool scan for errors on your SSD or HDD.

Note any error codes and use Dell’s error code lookup tool for guidance. If it’s a hardware problem, replacing your SSD/hard drive is mandatory.
Dell Laptop Boot Troubleshooting: Step 3: Diagnose Operating System Issues
Boot into Safe Mode
When Windows 11 or 10 encounters three consecutive startup failures, it automatically transitions into the Windows Recovery Environment (WinRE). This feature simplifies accessing Safe Mode when Windows cannot start normally. Here’s how to use WinRE to boot into Safe Mode:
- On the Choose an option screen, select Troubleshoot.
- Next, select Advanced Options.
- In the Advanced Options menu, choose Startup Settings.
- Click Restart.
Once your system restarts, the Startup Settings menu will appear. From there:
- Press 4 or F4 to enter Safe Mode.
- To enable networking while in Safe Mode, press 5 or F5.
This process ensures you can troubleshoot your system even when normal startup fails.
Steps to Perform a System Restore in Safe Mode
Search for System Restore: Once in Safe Mode, open the Start menu, type “System Restore” in the search bar, and click on the option to open it.
Create a Restore Point (Optional): If desired, click Create a Restore Point to save your current settings before proceeding.
Initiate System Restore: Select the System Restore button to begin the restoration process.
Choose a Restore Point: Select a date and restore point from the list when your laptop was functioning without boot issues.
Check Availability: If the System Restore button is grayed out or unavailable, it means the feature was previously disabled, and you cannot perform the restoration.
If your laptop boots successfully, the issue may be caused by a recent driver or software update.
Step 4: Repair or Reinstall Windows
If the SSD or HDD is functional, the issue may lie with your operating system. Here’s how to address it:
Perform a Windows Repair
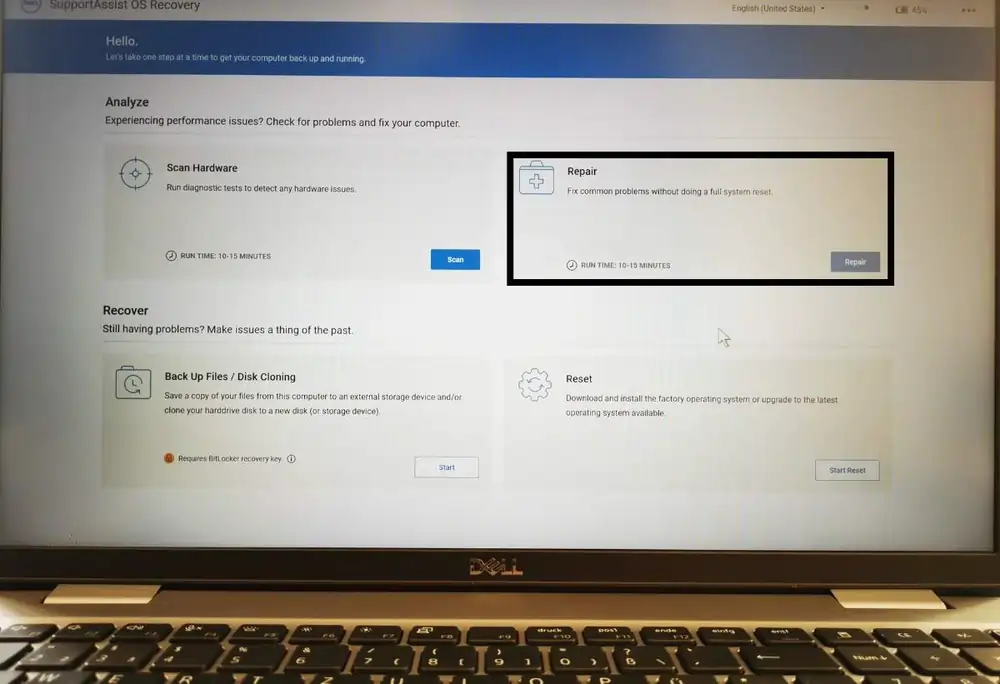
- Select “Support Assist Os Recovery” (press F12 repeatedly once the Dell logo appears in the start-up process) to get the Boot menu.
- Select “repair” and choose a restore point.
- Follow the prompts to revert to a stable state.

Reset Windows
- Create a bootable USB drive using Microsoft’s Media Creation Tool.
- Insert the drive into your laptop and restart it.
- Press F12 during startup to select the boot device.
- Follow the on-screen prompts to reinstall Windows.
For more guidance, refer to this post about Dell laptops not turning on.
Step 5: Advanced Troubleshooting
Test with an External Monitor
Connect your laptop to an external monitor if you see a blank screen. This helps determine if the issue lies with the display or internal components. Learn more in this guide to fixing Dell laptop display issues.
Reseat Your SSD or HDD
If you’re comfortable opening your laptop, reseat the SSD or HDD:
- Turn off the computer and unplug it.
- Open the back panel (refer to your user manual for steps).
- Remove and reinsert the drive securely.
- Close the panel and restart the laptop.
Tip: If this feels daunting, consider seeking assistance from Dell Support.
Preventing Boot Issues in the Future
Keep Your System Updated
Ensure Windows and drivers are always up to date. Visit Dell’s support page for the latest drivers.
Regularly Check Drive Health
Use tools like CrystalDiskInfo or Dell Diagnostics to monitor your SSD or HDD health.
Avoid Force Shutdowns
Always shut down your laptop properly to prevent file corruption.
Conclusion
Troubleshooting boot issues on your Dell laptop doesn’t have to be overwhelming. Following the steps above, you can identify whether the problem lies in the operating system or the SSD/HDD and resolve it accordingly. If you’re still stuck, don’t hesitate to consult Dell’s technical support team.
For more related troubleshooting tips, check out these guides:
- Ultimate Guide to Fixing Dell Laptop Display Issues
- Dell Laptop POST Failure: Causes and Troubleshooting
- Troubleshooting Power Issues on Dell Laptops
Do you have questions or tips? Leave a comment below—I’d love to hear from you!


